Experiment with the Trinket Pro and Neo-Pixels
I got a HackaDay Trinket Pro about 6 months ago and it is a great little board.
However, since only the Trinket is in Visuino and very experimental at this point I am venturing into unknown territory...I like living on the edge! ;)
So, I wanted to test out the Neo-Pixel Bar that I got, it has 8 Neo-Pixels on it and I added some 0.1 pins to the 4 connectors at the bottom of it, so I could just plug it into a breadboard.
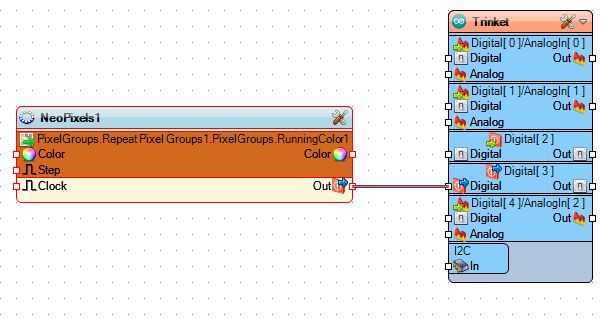
For this sketch I started with the Demo NeoPixelRepeatDemo.owarduino that is included with the Visuino base install. I just changed the board to the Trinket, which I will have to use for the Trinket Pro in Visuino and just be careful of what Pins I setup. I decided to use Pin 3 for the Din on the Neo Bar, as seen here:
The other part of the Demo are these components:
To build this up yourself, first you'd add the Neo-Pixel:
Next you will add the "Repeat Pixels Groups" to it by double clicking and then double
clicking this option:
Once in the "Properties" for the Neo, find "Pixel Groups" and click on the 3 red dots in a row:
Then you choose the "Running Color" option and exit this screen:
You should have what you see here:
Next add the "Random Color" generator and connect it to the "Color" Pin:
And lastly is the "Clock Generator" added to the "Step" Pin:
After saving my changes I hooked up the board and sent it to the Adafruit version Arduino IDE, which includes the boards that they make in one simple package. As of this writing that is version 1.6.4 which you can get here:
I just unzipped it to a Arduino folder on my C: drive then changed the Visuino Settings to point to it.
So, by default the setup for this are repeating random pixels that rotate down the bar, that is broken up into a group of 4 pixels, this setting can be seen here:
Here is an example of the 4 group Neos in action:
But I wanted to see all 8 pixels as different random colors so I changed this number to 8. Then here is an example of that:
That worked out great and I used some of my Visuino knowledge to modify an included Demo and came out the way I wanted it to.
Next Time: I will visit the Raspberry Pi and it's bound to be something cool ;)


