[1] How did you get into Computer hardware and other hardware related components?
When I was a kid, my father was mathematician, but his hobby was electronics. He was often building electronic gadgets. In the mean time I was increasingly getting fascinated with robots. My father had a number of books on electronics, and I tried few of them. The one that had real impact was a book on practical cybernetics, and electronics. It had a huge number of various electronic projects, everything from toys, to cybernetic animals, to robots, and even building your own lasers, and radio telescopes.
I was not able to build most of the project, but I felt the shear power you can get from the electronics, and I was hooked.
For couple of years, I played with simple electronic devices – photo relay, timers, and amplifiers. Slowly I drifted toward the idea of building my own cybernetic animal. At that time an article appeared in one of the Magazines that I was subscribed to about building a cybernetic chameleon. Basically, you put it on something colorful and it lights a light with the corresponding color. I decided to make a more complex version with multiple sensors, including sound, light sensor, bumper, and edge detector (So my chameleon will not fall off the table).
The project took about a year to complete, and it the process went trough few iterations, as I kept learning more and more. It started with mostly relay modules, and salvaged, germanium transistors, and ended with TI 74 series TTL components, and fairly modern silicon transistors.
By the end of the project I was reasonably proficient in digital circuitry and logic components.
It was exactly this time that I stumbled upon another important book by James Coffron.
At that time English language literature was not commonly available in Bulgaria, and rarely translated to Bulgarian. There were however couple of bookstores for Russian books and they were often stocked well with Russian translation of English language books. It was in one of those stores where I discovered the book. It is long gone, the name was in Russian, probably not translate word by word, but it most likely was “Practical Hardware Details for 8080, 8085, Z80 and 6800 Microprocessor Systems”.
I never was very good in Russian, but for this book, I scrambled whatever Russian I knew, and read it. It opened my eyes to the microprocessor architectures, and I was hooked for life. Other books soon followed and I gained decent knowledge, especially of the Motorola 8600 processors. At that time Bulgaria was manufacturing a Motorola 8600 copy, and I set to get myself one together with some EPROM, RAM, and PIA (A programmable I/O module). The parts were not sold to the public, so during my summer vacation, I visited as many institutes and factories, that I could, begging for parts.
At the end of the vacation, I had succeed to collect enough parts to put together my own small computer. I had the processor, the PIA, RAM, EPROM, some logic chips, decoders(for the addressing space), some keys, and 7 segment display.
While I was waiting for the parts, I was busy making different designs. I was also studying 6800 Assembler.
I knew that the parts alone are not enough. I needed some execution environment capable of controlling the keyboard, and the display. Nowadays this is called BIOS, at that time it was known as JBUG. I did not have access to any existing code, so I set to write my own JBUG. I did not have text editor, assembler, or access to any other computers, so I started writing it on paper, and debugging it on a blackboard. I would have my grandmother helping me by drawing pictures of the registers, and the stack on the black board, and updating the values in them, following my instructions, while I would be tracing the execution line my line, on the paper.
By the time the pars arrived, the software was already prepared and grandma, debugging.
I did not have any universal breadboards, so I made my own, and soldiered the components.
While I was doing that, some Apple ][ clones, became available, and I got access to them. I also found an MC6800 Cross Assembler called Merlin 6800. I also got access to Apple ][ EPROM programmers, so I entered my code in the assembler, and programmed it.
I plug the chip, and it worked... well almost. The keyboard did not work, because I had not noticed that the IRQ is disabled by default after reset, and you need to enable it. After enabling the IRQ, my first computer was fully operational.
From there I set to build a mobile robot with the new computer, adding sensors to the PIA, and motors to drive the robot – essentially a smart car.
I went on to win 2 national prizes in “Practical physics” for students 2 years in a row with the cybernetic chameleon, and the robot.
[1Q2] Which do you think was the most innovative product for you during this time in your life?
With no doubt the most innovative product was the 6502 processor. This chip was revolutionary on many levels. Unlike 6800 it was able to be clocked with a single TTL signal. When introduced it was order of magnitude cheaper than anything else on the market, and forced other processor vendors to drop prices. It also is probably the first processor to introduce RISK like concepts. It had a reduced number of instructions, but increased number of addressing modes for them. Very much all instructions were vary fast executing at 2-3 clock cycles. Finally it had a special treatment for addresses 0-255, treating them almost like a set of 256 slightly slower registers. This made it extremely fast processor outperforming most 16 bit processors at the time, even when they were clocked at much higher frequencies.
[2] What got you interested in Software and Software Development?
The development of the JBUG for my first computer surely was a crash-course in Assembler software development. At the same time as I mentioned the Apple ][ clones also became accessible and I started learning Applesoft Basic, and 6502 Assembler. In the years to follow I gained more knowledge of software development, and learned some UCSD Pascal for Apple ][. Most of the software I wrote in those early years was focused on hardware control, and communications, although I also did some small modifications of a Basic interpreter for MC6800 as part of work I did on another MC6800 personal computer design of my own. In the late 80s I started learning some C as it was the language of choice for cross-platform hardware related development. In 1989, as the PCs were becoming more accessible, I got my hands on an Borland C++ 1.0 Beta, and loved it from the start. Here was an Object Oriented language with the full power of C to access hardware. In the following few years while still doing a number of hardware designs, and writing firmware and Assembly code including development of a software simulator for Oric clone, I also gained increasing experience with Object Oriented Programming. By 1993 I was working with couple of other people on joined development of controllers for 8 bit computers – Apple ][ and Oric compatible. The development was cool, but the market was shifting away from the 8 bit systems and into PCs and the need for controllers was decreasing. At that time another company with which we had business relationship suddenly needed help, and hired us to develop a fairly complex PC Based telex system. Since I was the only one with some C++ knowledge, I ended up developing most parts of the software. In retrospect, this was the moment in time when I transitioned from hardware designer into software. In the following 3 years, I worked on a number of Object Oriented Software projects with increasing complexity. They all had some form of interaction with specialized hardware, but the majority of the code was pure software. By 1996 I had become practically purely software developer, although I did one last hardware development in 1995-96 – an Internal Circuit Emulator for Z80 with a Z80 disassembler.
In 1996 I moved from Bulgaria to the US, and continued with more and more complex software development, although always related with some custom hardware control, ending up with the latest development of Visuino, so the truth is that what got me interested in the software was my desire to control the hardware.
[2Q2] Since you now develop in Delphi, which is an off shoot of Pascal, is it your all-time favorite language now?
It is difficult to say all time favorite. I used to be a huge C++ fan, and for long time C++ served me well, and was at the cutting edge of the technology, introducing object oriented programming, and templates. Unfortunately C++ had fallen significantly behind, and has completely lost its edge over the rest of the languages. In the mean time Delphi has evolved from a relatively conservative old fashion procedural programming language to a very modern cross platform one, introducing Object Oriented Programming, advanced modern RTTI, Anonymous methods and support for functional programming, and attributes, and support for multiple platforms. Although there are a lot of things I don't like in Delphi, at present there are simply no other choices. C++ has only symbolic RTTI, and lacks any support for Attributes, while Java has no support for low level real time hardware control, real time tasks, and due to its non deterministic Garbage Collection implementation is very error prone, and memory/resource leak prone. Java also lacks attributes support. .NET has the same Garbage Collection issues, in addition for most parts is Windows only, and is not well suited for real time tasks. So while I don't really love Delphi, I use it as it is the only available choice that has the features I need.
[3] When and How did you notice Arduinos and other MCU type hardware?
2014 was a very stressful year. I had been handling 3 big contracts, as well as maintaining all the Mitov Software products. One of the contracts was a particular worry. I was paid only a small fraction of the work, and that barely covered the money I paid to some subcontractors to help me with some of the involved items, but I was promised 6% shares in the company, as compensation for the rest. The problem was that the CEO made similar deals with other people, and then accusing them of not delivering what they were supposed to do refusing to give them the shares, and threatening to sue them in order to make them quit. By the end of 2014, there were all indications that the same play was in motion in my case. I will not bore you with all the details of this nasty game and how it played out at the end, but all this had taken heavy toll on me. I needed to have something to help me relax my nerves.
I always wanted to make a version of OpenWire Studio to program Firmware. I tried 2 times before, and each time the other side decided not to pursue it. In the mean time I have been watching the Raspberry Pi and Arduino development, and got increasingly excited about them. Since of the two, the Arduino is closer to a micro-controller, I liked it better for controlling hardware. I thought that playing with Arduino will be the perfect way to relax my nerves, and since it was Christmas, I ordered myself and Arduino KIT. It arrived, but I did not have a chance to really start playing with it until January 2015.
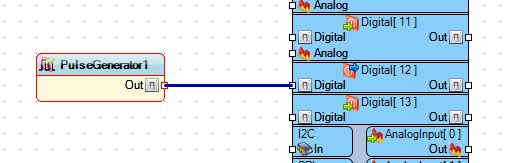
When I finally started digging into it, I was a bit shocked. It was supposed to be an easy to use platform for everyone. I was supposed to be able to put together and program whatever I want in just few minutes. The hardware, was fine, I was able to hook my projects in no time, however the first time I tried to control multiple sensors and outputs, it became apparent that the software is a considerable challenge even for me. Hooking Servo, photo resistor, LED and Ultrasonic Ranger simultaneously was not an easy task to solve, especially with the different timings on the Servo. A stepper motor was even more challenging. While trying to come up with some way to make it easy to manage, I came up with an architecture that was also perfect for OpenWire Studio integration, I started working on the idea, and in 5 days I got my first working Visuino prototype, and demonstrated it during the Delphi Week in February, just few hours after it became operational.
[3Q1] I know you are a bit partial here, but do you think Visuino will be the WAY to program and other visual IDE solutions OR do you think the old coding by hand method won't fade away?
Traditional procedural programming has been around for about 200 years, ever since Ada Lovelace developed the first code for the Charles Babbage's mechanical computer. Much the same way as high level languages have not made Assembly language development disappear, graphical programming is unlikely to make other forms of programming to disappear. It simply is higher level of programming. The concept is not completely new. As most of the modern computing concepts it can be traced back to PARC (Palo Alto Research Center), and the team there. I was shocked to see last year, and old presentation of Small Talk graphical programming. It was not at the same level as OpenWire and Visuino, but the vision was there. It seems like everything we have come to enjoy nowadays really comes from PARC, from the Graphical Windows based UI, the document drag and drop, the mouse, the networking, the object oriented programming, and finally the graphical programming. It all was envisioned and initially prototyped at PARC, and we all are just following in the footsteps of those PARC giants. While all of the other concepts have finally been adopted, and have come to dominate the industry, the graphical programming is yet to reach it's full potential. Visuino is a small step in this direction. If the success of the other PARC technologies, is any indication, the Graphical Programming holds a huge promise, to become the dominant way of programming.
Conclusion by Boian Mitov
When Apple ][ arrived with built in Basic, it made programming popular among non developers, and inspired a whole generation to pursue carrier in technology. The Arduino boards make it very easy to connect sensors, displays, and actuators, but do not make software development easy for the average person. Visuino was envisioned, and created from the ground-up to make it possible even for somebody with absolutely no programming knowledge to be able quickly and easily to design software to control those peripherals, and thus holds the promise to inspire another technology generation in the same way.
When the computer industry was born, two aspects of it emerged. The Hardware and the Software. While we all know that a hardware element, can be modeled and implemented in Software, the tools and approaches to design software and hardware differ a lot. With the introduction of FPGAs the difference between Hardware and Software capabilities became even smaller, but the difference in the development approaches remains. The Graphical data-flow development tools offer a way to bridge the gap and to introduce a more uniform way of designing software and hardware, really blending the two together for first time.


